Palette Controller
Palette is a modular controller designed for graphic design, audio-editing and video-editing applications.
Each module consists of a button, slider, knob, or other control, and you can snap multiple modules together to form the controller of your choice. Each module can then be associated with a software control for your favourite CAD, DJ-ing or video-editing software. You can create multiple profiles such that you have a custom controller for each of the software packages you use - for ultimate productivity!
Palette was created by my friends and I as our fourth year design project at the University of Waterloo. Our team consisted of myself, Brent Komer, Luke Becker and Calvin Chu. We each took on one aspect of the controller and worked hard for 8 months to bring it to fruition. We presented it at the Systems Design and Mechatronics Symposiums, where we gathered a lot of interest and great feedback from potential users. Photos from this event can be found below.
Palette was created by my friends and I as our fourth year design project at the University of Waterloo. Our team consisted of myself, Brent Komer, Luke Becker and Calvin Chu. We each took on one aspect of the controller and worked hard for 8 months to bring it to fruition. We presented it at the Systems Design and Mechatronics Symposiums, where we gathered a lot of interest and great feedback from potential users. Photos from this event can be found below.
After graduating, Calvin Chu continued to work on Palette. He was accepted to HAXLR8, a hardware accelerator based out of Shenzhen, China where he further refined Palette. Now, you can find Palette on pre-sale at the Palette Gear website, which was launched as part of Calvin's successful Kickstarter campaign!
The Process
To build Palette, our team split the work into four sections that each of us managed: Mechanical, Electrical, Embedded Software, and the Desktop Software Suite. I worked on the latter.
After coming up with a vague idea for a controller, we wanted to gather as much feedback as possible. We sent out surveys and had interviews with a number of individuals who used some of the software that we thought we should target - everything ranging from video games to CAD to DJ-ing.
We asked individuals about their pain points, whether they already used additional hardware peripherals - and if so what they liked and disliked. We also spoke to individuals about what benefit they would see from a custom, modular controller and how much they would be willing to pay.
All of this information gathering helped us narrow down our scope - gamers weren't interested, there's already plenty of expensive controllers in the market, and that people wanted full control. With this in mind, we developed our first prototype.
Prototype 1
The prototype was not free-form, instead it had a deck where you can plug in modules - this simplified the work that we needed to do, after all we just needed a minimum viable product to test. There was no housing or UX implemented, it was strictly a functional prototype - bare perfboards and wires. A photo can be seen in the slideshow above.
The tray housed a Teensy++ 2.0, a prototyping board similar to an Arduino. The advantage of the Teensy was it's smaller size as well as it's ability to simulate a USB device (key, more on this later). Housing the Teensy in the tray allowed us to simplify the individual module design to be passive, as power and processing was all centralized.
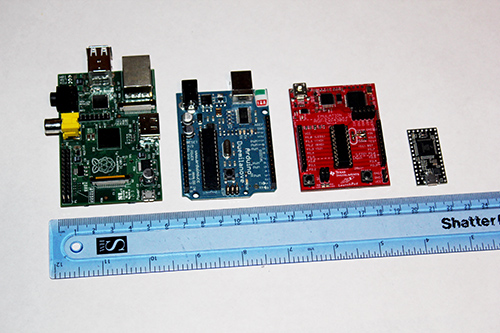
Size comparison of Arduino boards (left) and Teensy (far right).
|
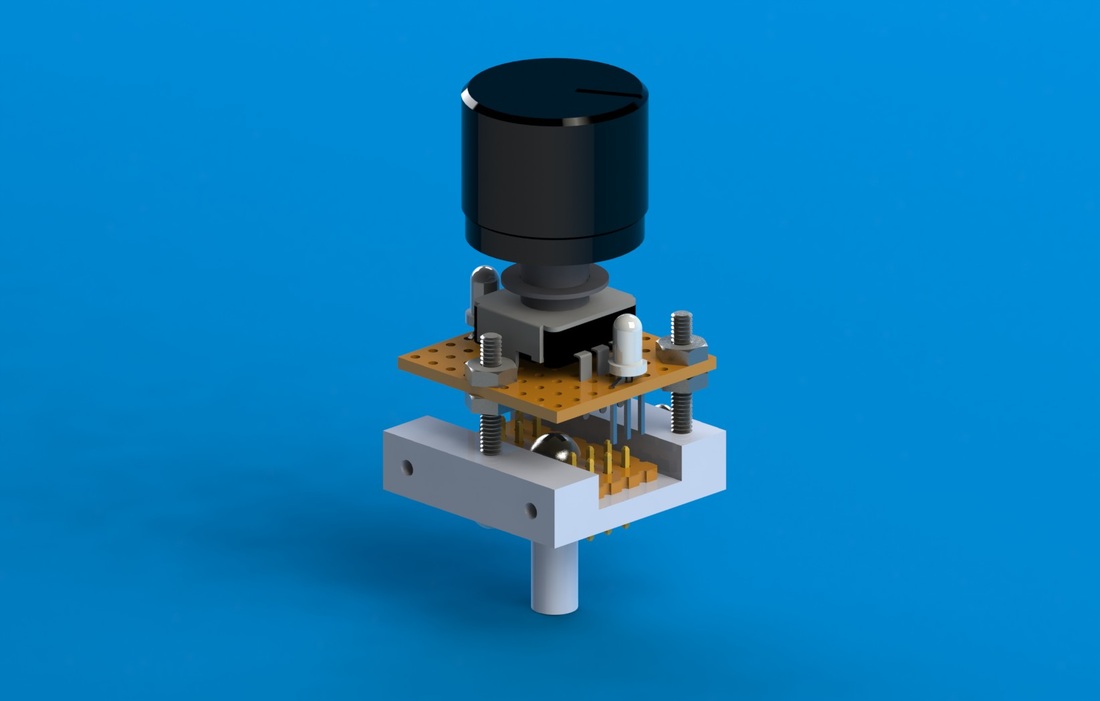
Each module housed either a button or a knob. No desktop software was created yet, but we would manually identify a module by reading it's ID value. This ID value was implemented very simply - using a resistor. Although this method is not scalable, it was the simplest solution for our prototype.
Using the ID values, were were able to manually assign software controls to each module, and the software would remember that "Module with ID: 51" was programmed to "Zoom". Each module's commands were implemented very simply as well - using software shortcuts. To increase their brush size in Photoshop, a user simply had to press the ']' key. We set a threshold for our knobs, and for each 1/x of a turn, the controller would send a ']' command. By simulating other keyboard and mouse commands we implemented all of our other controls. Although this implementation was not fool-proof, it was effective to start testing the viability of our idea.
Prototype 2
Prototype 2 built upon Prototype 1 to deliver a superior functional experience, while also prototyping the mechanical design, desktop software and aesthetics. Continuing with the tray form (much easier to prototype, as opposed to giving each module it's own brain) we created mock-ups of our controller, as seen below.
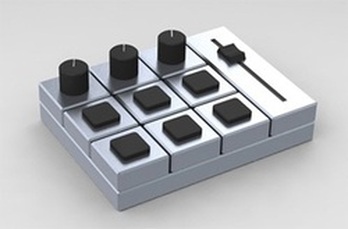
Prototype 2 concept.
|
Taking into account our time limitations and the horror stories we heard from classmates about ordering PCBs from China, we decided to solder all of the components ourselves to perfboard, and change the design of the housing to leave space for the Teensy.
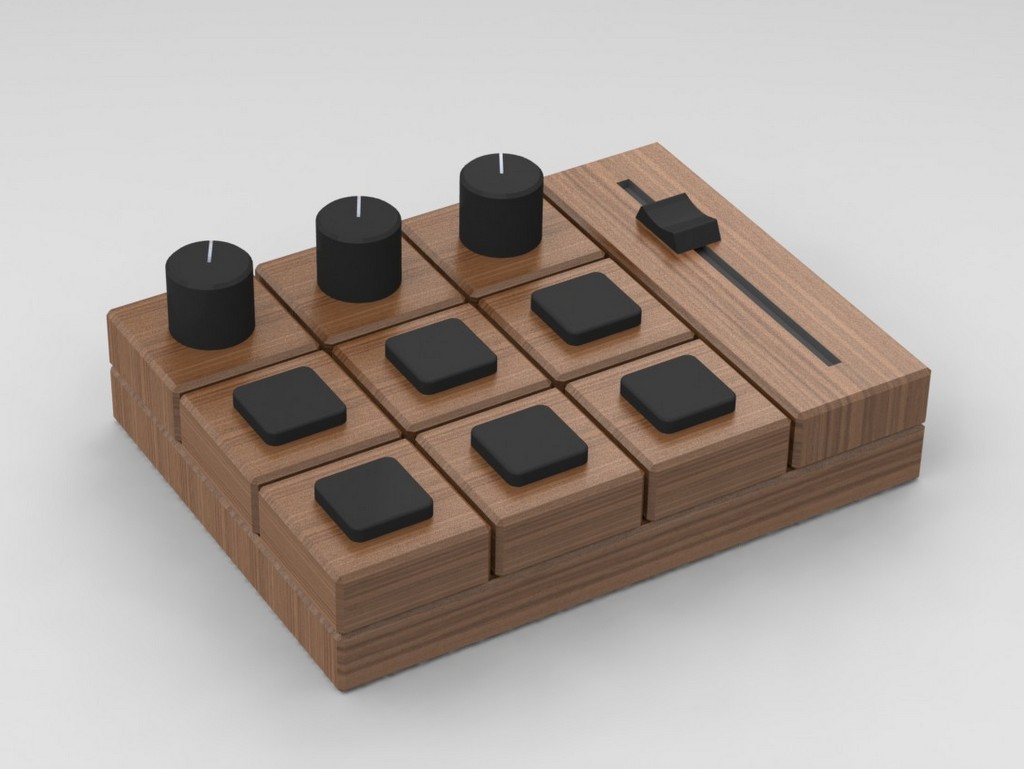
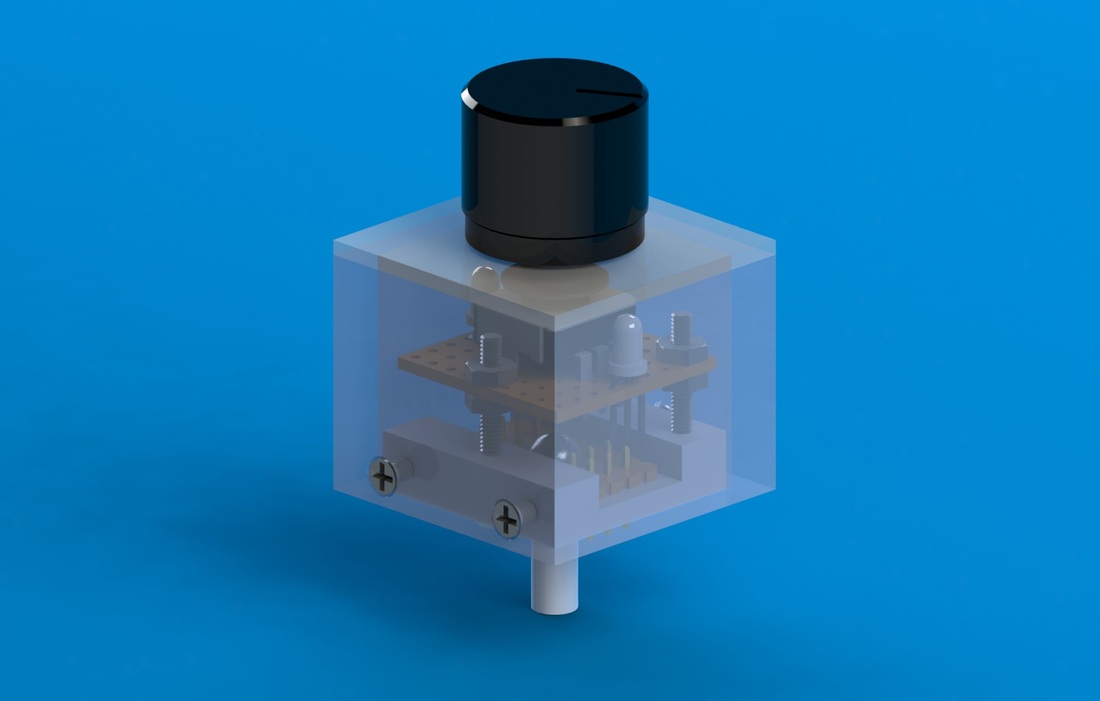
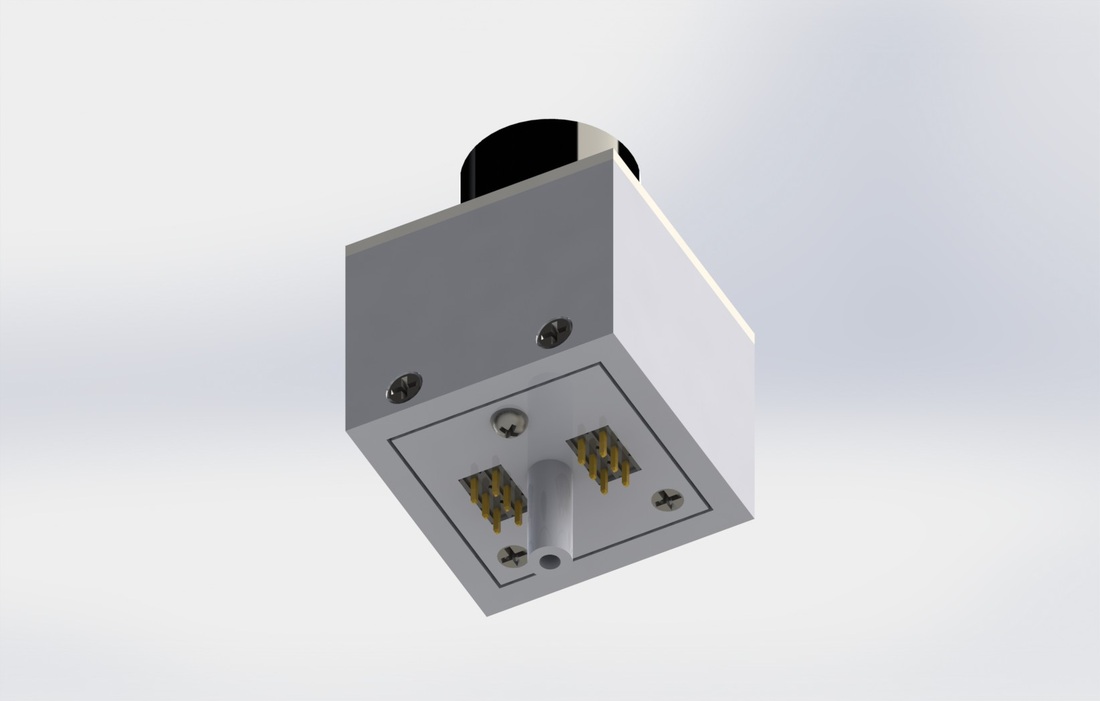
The tray housing was created out of wood as it was our easiest and cheapest option for a clean-looking product. We created several different styles of modules - wood, metal and acrylic finish. CAD drawings, courtesy of Calvin, can be seen below.
The tray housing was created out of wood as it was our easiest and cheapest option for a clean-looking product. We created several different styles of modules - wood, metal and acrylic finish. CAD drawings, courtesy of Calvin, can be seen below.
|
|
|
More to come soon!
The Team
I really enjoyed working with 3 other talented and motivated individuals on this project. Our day-long brainstorming, late-night coding sessions and Jungle Speed battles is what I will remember as I look back on my fourth year. Not something you always get in the real-working-world! But I'll strive for it :)
Here are some photos of our finest moments!
